
Stunning Kitchen Renovation in St Louis
Life is full of big moments. For this family, two of those moments were rapidly approaching: their daughter’s wedding and the start of retirement. Both called for celebration, but another event had been waiting in the wings for years—a full kitchen renovation in St. Louis.


Out with the Old: Assessing the Original Kitchen
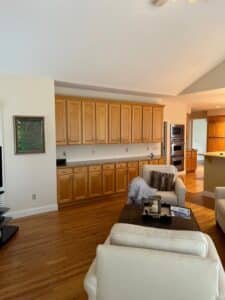
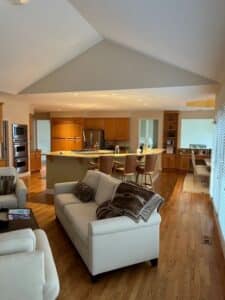
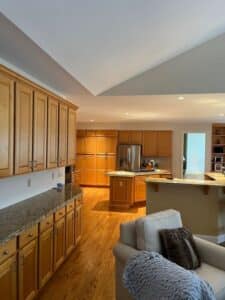
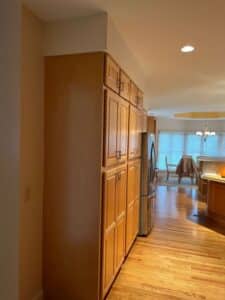
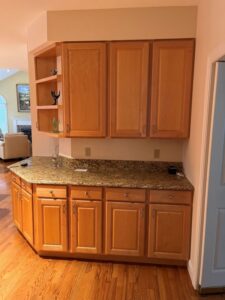
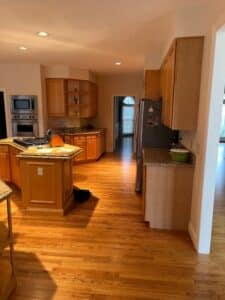
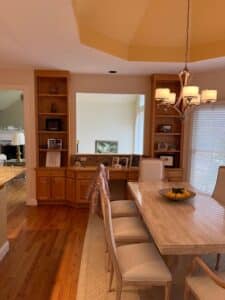
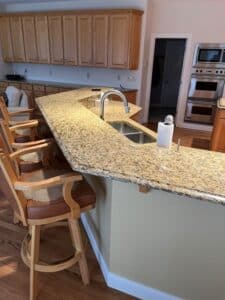
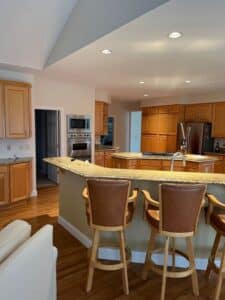
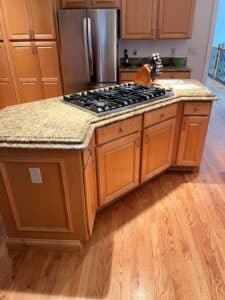
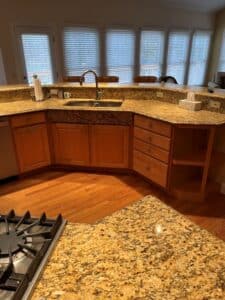
The existing kitchen had all the hallmarks of a typical design from years past. The 42-inch cabinets didn’t reach the ceiling. The perimeter and twin islands were adorned with a medium-stained, square, raised-panel design. The countertops? Granite—but not the kind that sparked joy. And while the premium appliances were still doing their job, the cooktop downdraft had long since given up, leaving the kitchen without proper ventilation.
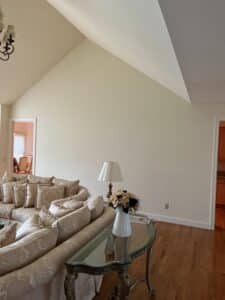
This space had potential—so much potential. At the very top of the homeowners’ wish list was the possibility of removing the wall that separated the kitchen from the main living area.
Existing Kitchen in St Louis Before Renovation
Completed Kitchen Renovation in St Louis


Ready to get Started on Your Remodeling Project?
To Remove or Not to Remove? Considering a Kitchen Wall Removal in St. Louis
Knocking down walls is a popular request in St. Louis kitchen remodeling projects. Let’s be honest—we love doing it. Opening up spaces, increasing kitchen footprints, and creating a seamless flow between rooms is what we do best. But before we start swinging sledgehammers, there are always important things to consider.
First, structural integrity. As part of our 4P Remodeling Process, we always assess whether a wall is load-bearing. Even if it is, that doesn’t mean it has to stay—we can usually replace it with a beam or additional structural support.
What’s Inside the Wall?
Second, what’s lurking inside that wall? Even if it’s not structural, chances are it’s hiding vital elements like cold air returns, HVAC ducts, plumbing, or electrical wiring. This is particularly common in two-story homes, and adjusting these systems can increase the overall project cost.
Floors, Ceilings and Paint
Third, let’s talk about floors and ceilings. Once a wall comes down, the flooring underneath needs to be patched or replaced to match. If the ceiling has different textures in adjoining rooms, that’s another detail to address. Of course, there’s painting—because when walls disappear, suddenly everything needs a fresh coat.
Oh, and if the wall being removed is structural? That means drawings, approvals, and permits from St. Louis County—all of which add time and cost to the project.
Luckily for both us and the homeowners, the wall in question wasn’t structural. But it was packed with electrical wiring, all of which had to be relocated. Knowing this, we created two designs: one with the wall entirely removed and another with a partial wall to help manage the budget.
Designing a Dream Kitchen Renovation in St. Louis
The Must-Have Features
The homeowners had a few non-negotiables. First, they were in love with Frigidaire’s integrated full-size freezer and refrigerator combo. Using a linking kit produces a smooth, upscale appearance.
Next, the cooking setup. They wanted to switch to an electric induction cooktop and downdraft. Since the basement below was fully finished, we had to keep the cooktop in a location that worked with the existing venting. And the real kicker? They wanted double ovens. We had the space, but with so much wall space removed, figuring out the perfect placement was a challenge.
Triple Island Layout: The Ultimate in Kitchen Design
More Islands, More Fun
How many islands can one kitchen have? According to this remodel—three. Not only did we dramatically increase counter space, but we also improved storage, despite eliminating so much wall cabinetry.
We maximized space by taking the new cabinets to the ceiling. Inside, we added rollout shelves and full-depth adjustable shelving. Every base cabinet featured full-extension, soft-close drawers, with extra-wide drawers for optimal storage. We also ensured that all base cabinets had full-depth shelves—a game-changer, considering most base cabinets only come with half-depth shelving, leaving the front portion underutilized.
Smarter Storage & Functional Features
The homeowners didn’t just want a beautiful kitchen—they wanted a kitchen that works. So, we loaded it up with functional accessories:
- Extra-wide cutlery divider: Keeps utensils and gadgets neatly arranged.
- Wood tray dividers: Perfect for organizing cookie sheets, cutting boards, and cooling racks.
- Soft-close trash pull-out and recycling center: Because no one likes an overflowing trash can.
- Knife block and spice drawer: A chef’s dream for quick and easy access.
Stylish Finishing Touches
The small details are what transform a kitchen remodel from simply nice to truly stunning. To add a furniture-like finish, we specified custom paneled ends on the middle island, complete with split-leg posts at each end—hiding seams and creating a polished, high-end look.
For the large island, we went bold with quartz waterfall edges where the wall once stood, blending function with visual impact.
And the double ovens? We found the perfect spot. Two 30-inch Bosch convection ovens now sit side by side next to a built-in microwave—all conveniently tucked into the main island.
Let There Be Light: Lighting Upgrades for Your Kitchen Renovation
Lighting can make or break a kitchen, so we went big. We installed tunable recessed LED lighting, allowing the homeowners to adjust the color temperature to complement their kitchen’s finishes. Under-cabinet lighting enhances both functionality and the beauty of the full-height Cambria backsplash. The hutch area? It got full interior lighting to highlight the glass doors and display items inside.
Cabinets That Balance Style and Budget
While our custom cabinetry wasn’t quite within budget, we used one of our high-quality semi-custom cabinet lines, which saved approximately 15% without sacrificing beauty or function.
Flooring Fixes and Finishing Touches
We patched the flooring where the wall came out and had the entire main level’s wood flooring refinished, ensuring a seamless transition across the open-concept space.
Kitchen Renovation Timeline: 15 Weeks from Demo to Done
Our typical St. Louis kitchen renovation timeline is 8–12 weeks, but this one wrapped up in 15 due to the wall removal and additional work required along with the full-height backsplash. Here’s the week-by-week breakdown:
- Weeks 1-2: Demo, wall removal, and framing.
- Week 3: Plumbing and electrical rough-ins, plus inspections.
- Week 4-5: Drywall, taping, and sanding and painting.
- Week 5-6: Full wood floor refinishing.
- Week 7-8: Cabinet delivery and installation.
- Week 9: Countertop template measurements and appliance prep.
- Week 10: Appliance Installation.
- Week 11: Quartz countertops installed. Full height quartz backsplash measured.
- Weeks 12: Full-height quartz backsplash installed.
- Week 13-14: Final plumbing, electrical, HVAC and finishing touches.
- Week 15: Final inspections completed and project closeout.
By the end of week 15, we wrapped up the final walkthrough, and the homeowners were free to island-hop to their heart’s content.
A Kitchen Renovation Worth Celebrating
Checking off a kitchen remodel from the to-do list is a huge accomplishment. With this space transformed, these homeowners can now focus on the truly important things in life—retirement, weddings, and all the celebrations ahead.
When you’re ready to cross a kitchen or bathroom remodel off your list, call Thompson Price Kitchens, Baths, and Home. Let’s make your dream space a reality!


