Rustic Imperial Kitchen Remodeling Project
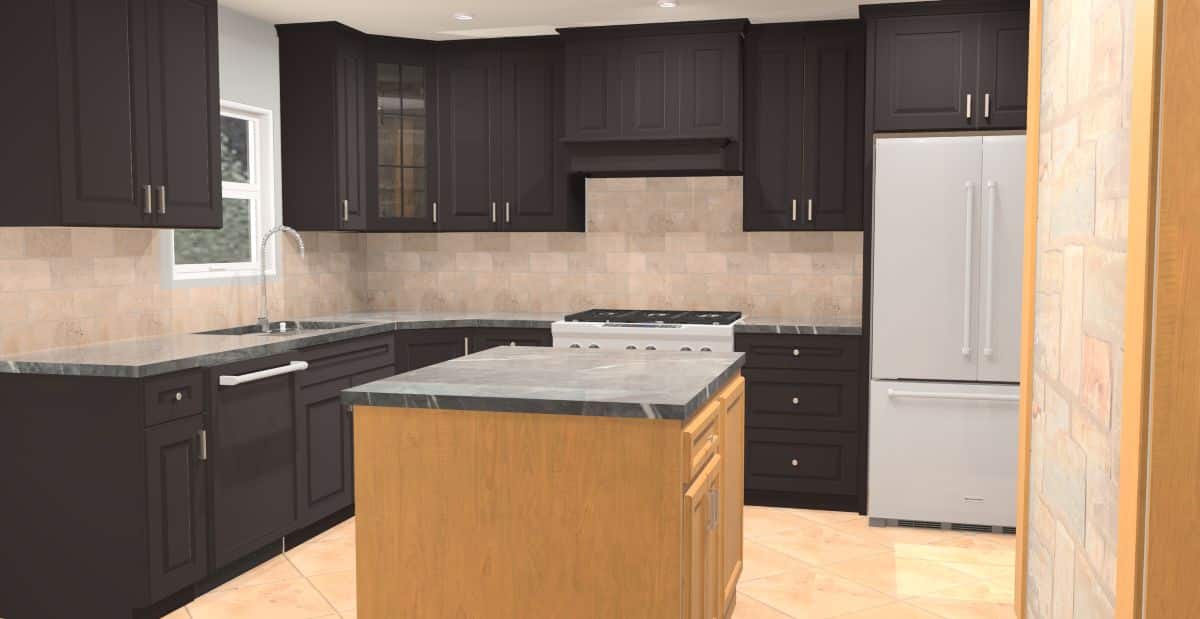
Custom cabinetry featuring old world finishing techniques, travertine tile and natural stone countertops make this rustic kitchen located in Imperial, MO really stand out!


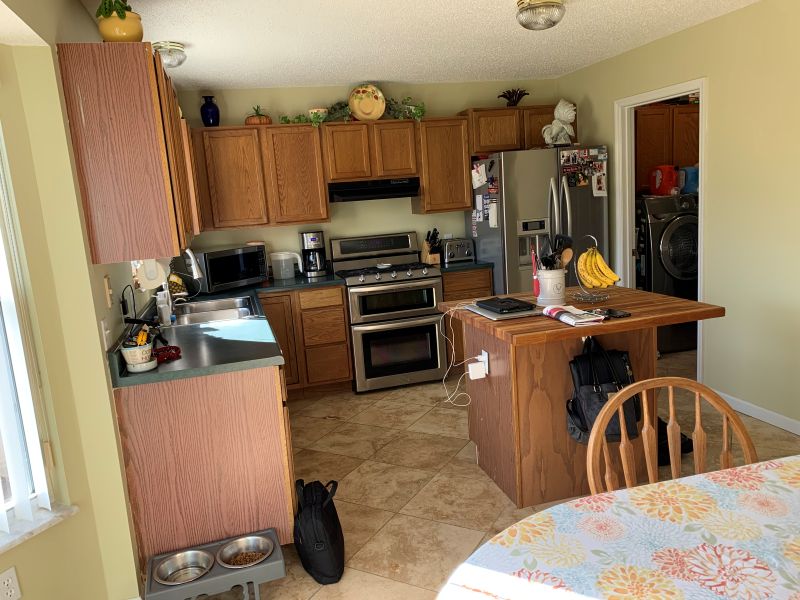
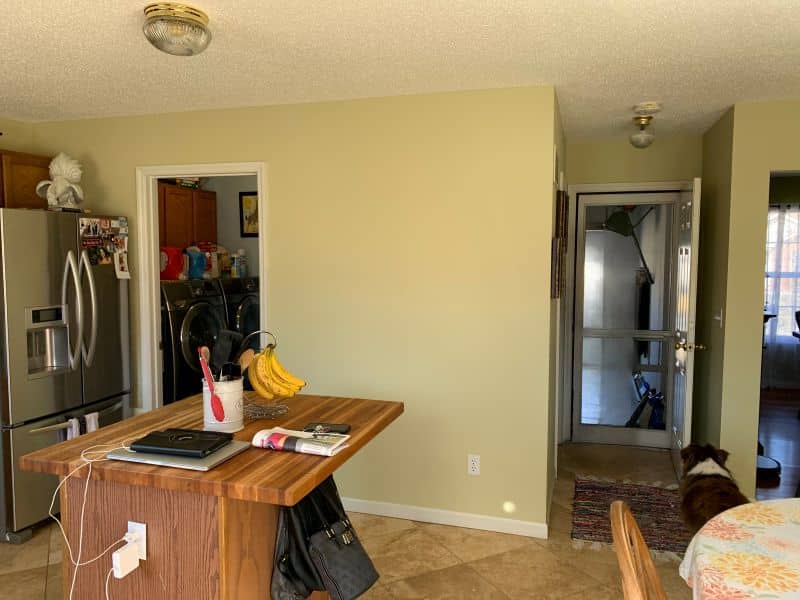
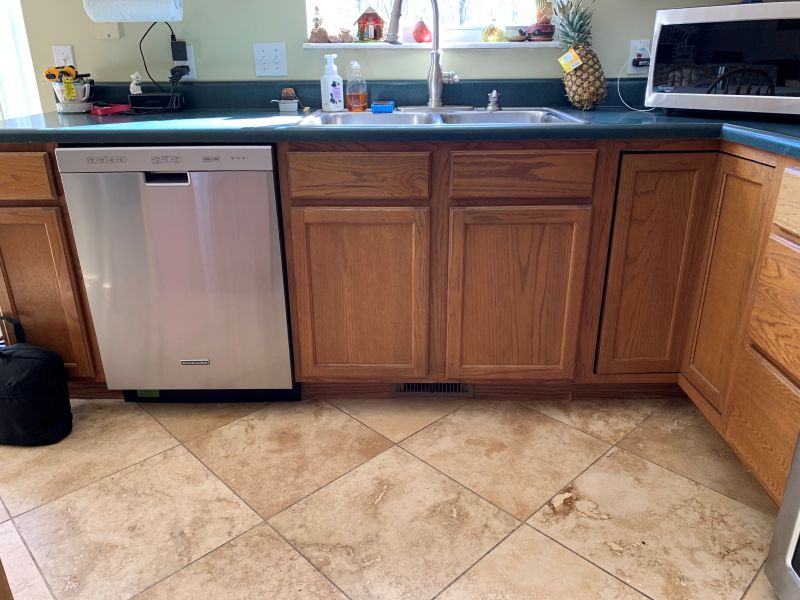
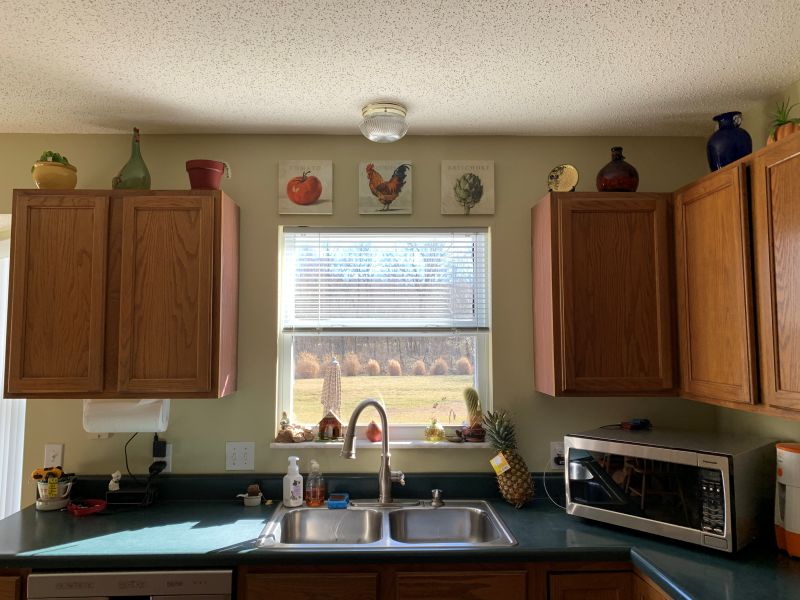
This kitchen in Imperial, MO, clearly needed some attention. The original layout felt cramped, and the cabinets were of builder-grade quality. Additionally, because no hardware had ever been installed, many cabinet doors and drawers showed significant wear from years of being pulled open by hand.
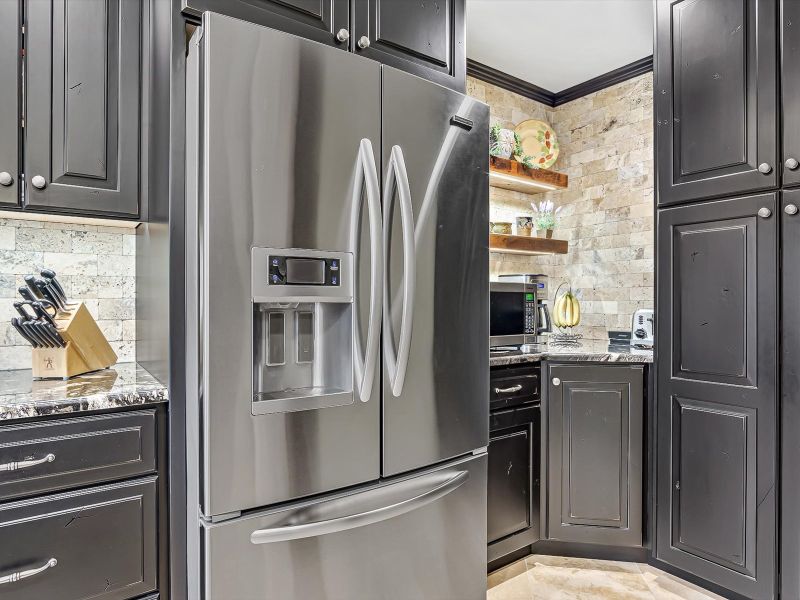
Several appliances were malfunctioning as well. The dishwasher only had one working cycle, and multiple burners on the range no longer functioned. However, we decided to keep the refrigerator since it was only a few years old. The laminate countertops, on the other hand, presented a problem. The seam had split, and the front edge near the dishwasher was beginning to delaminate. The only part of the original kitchen that remained intact and usable was the travertine floor, which had been installed a few years earlier.
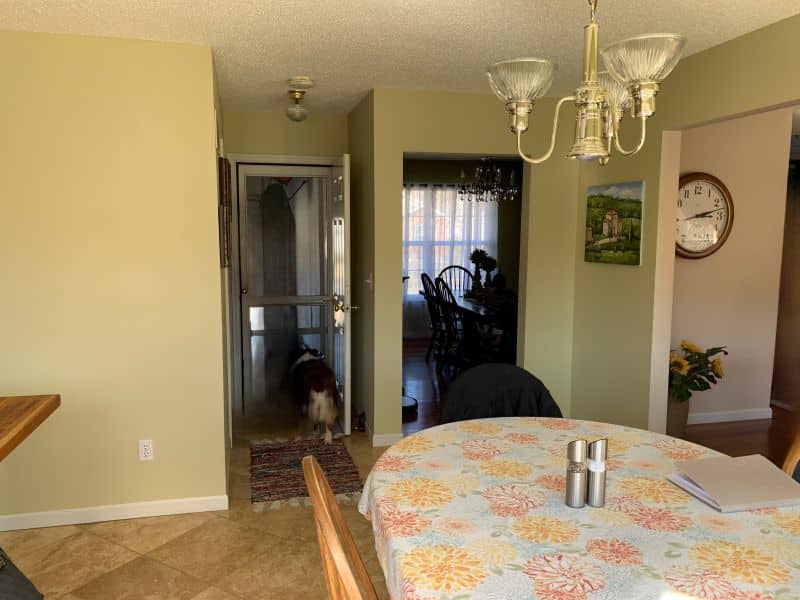
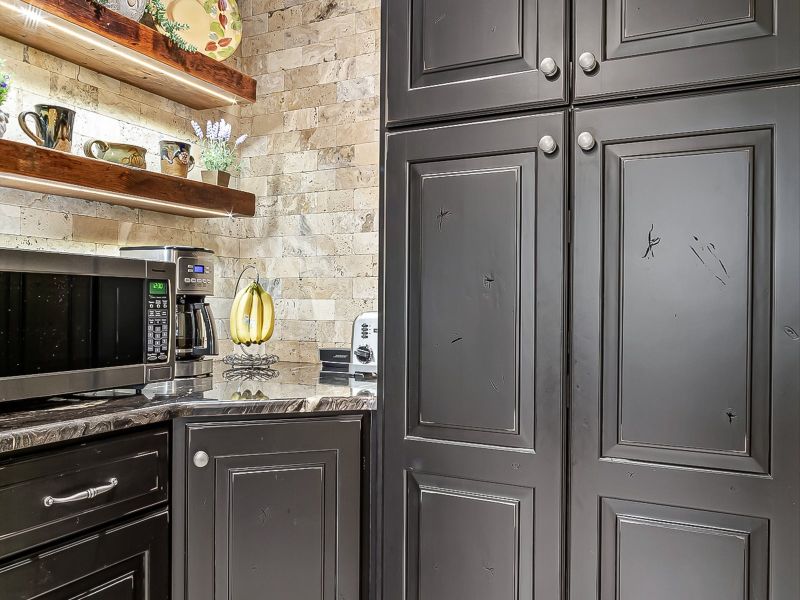
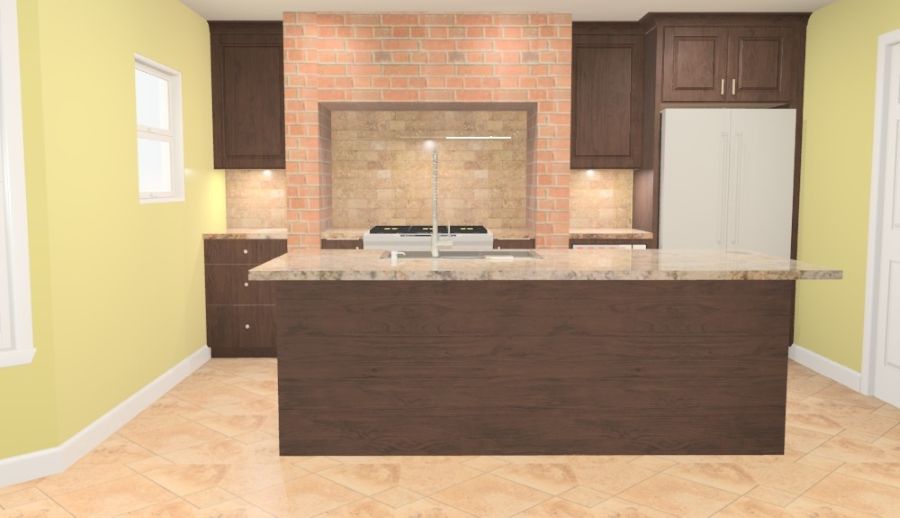
Existing Rustic Imperial Kitchen Remodel
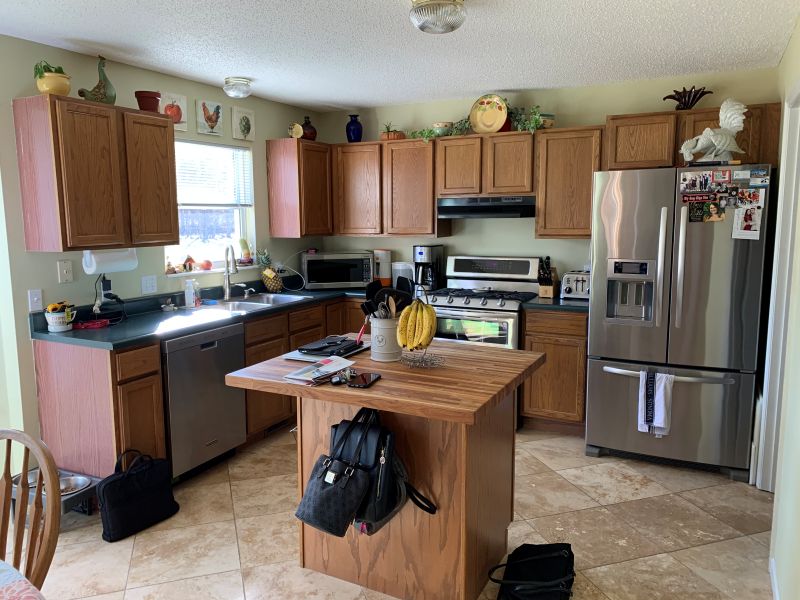
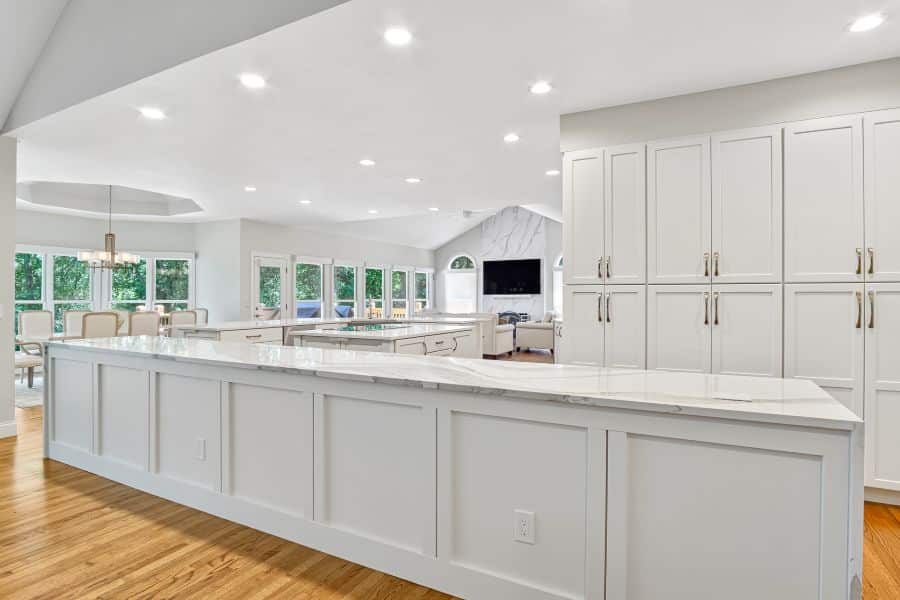
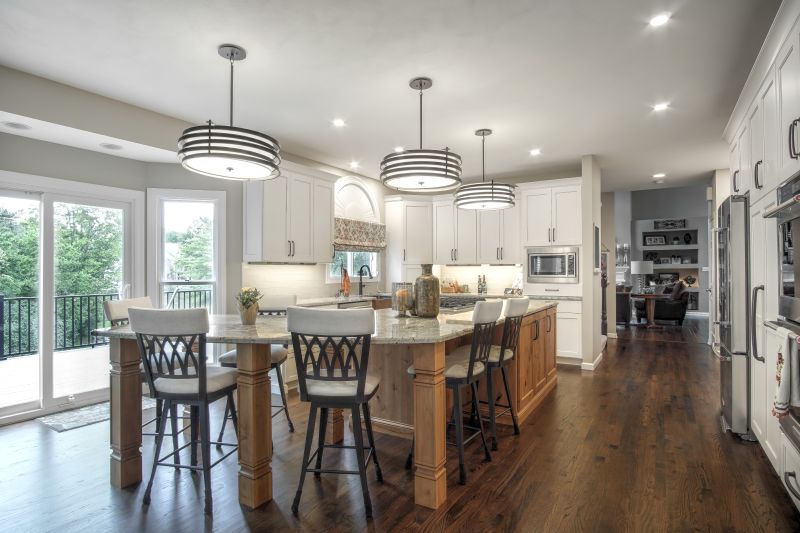
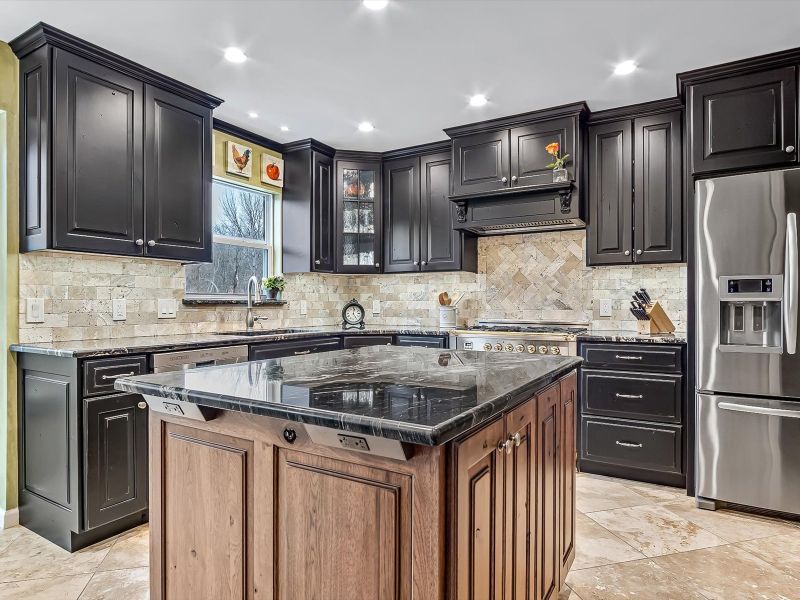
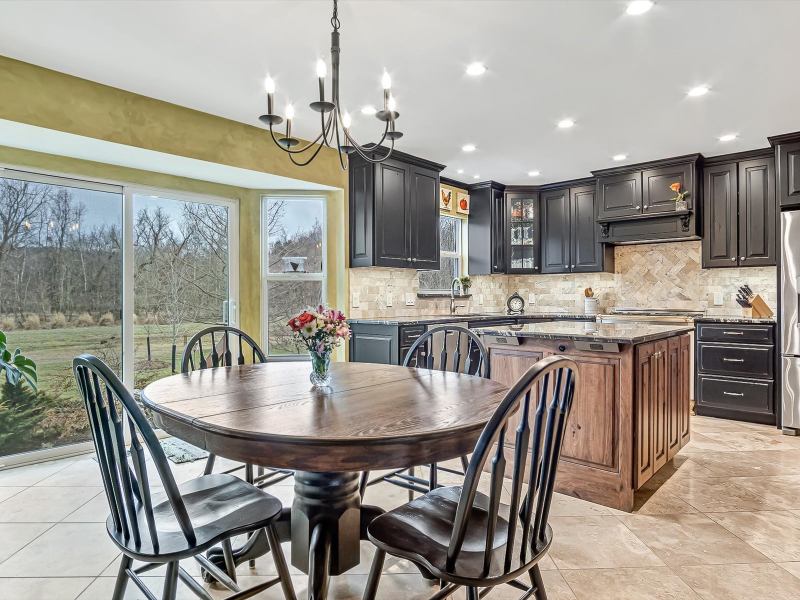
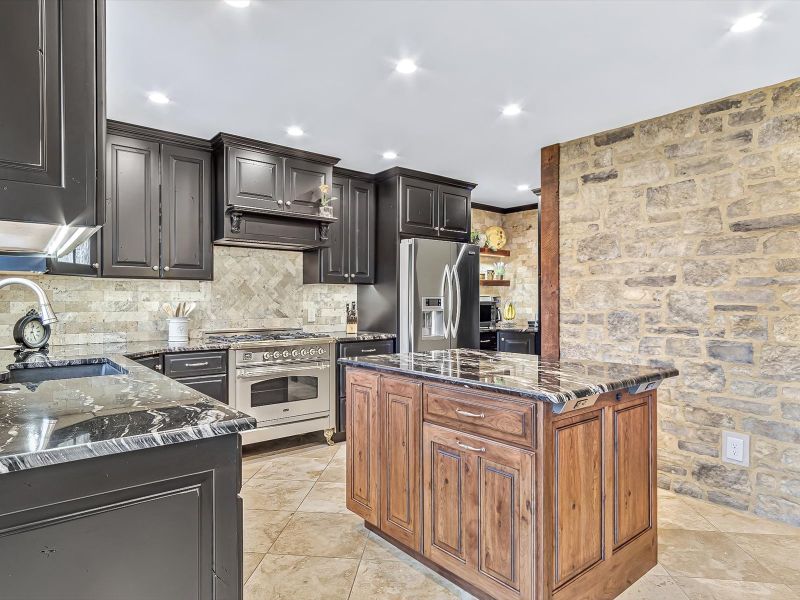
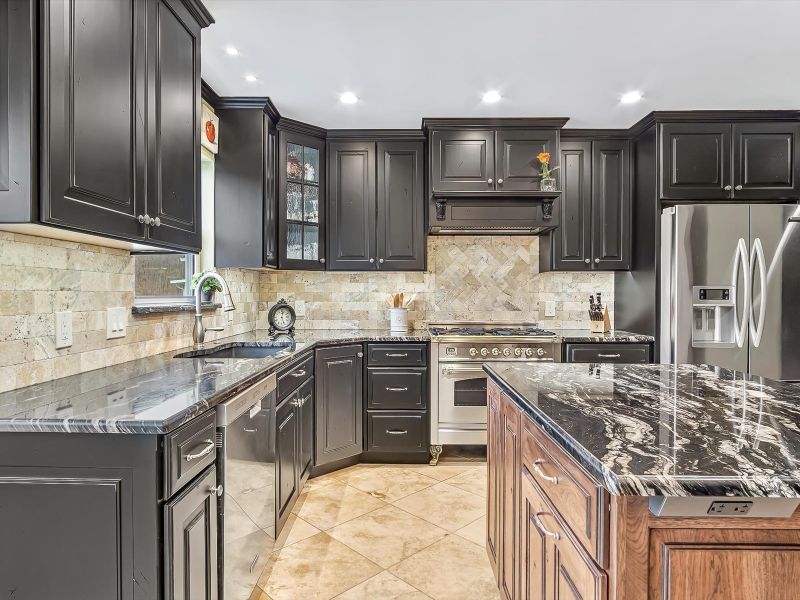
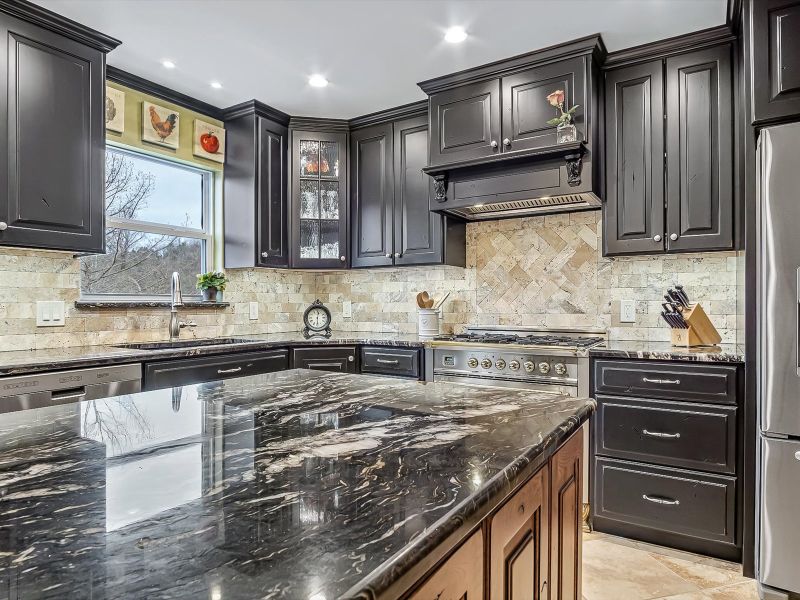
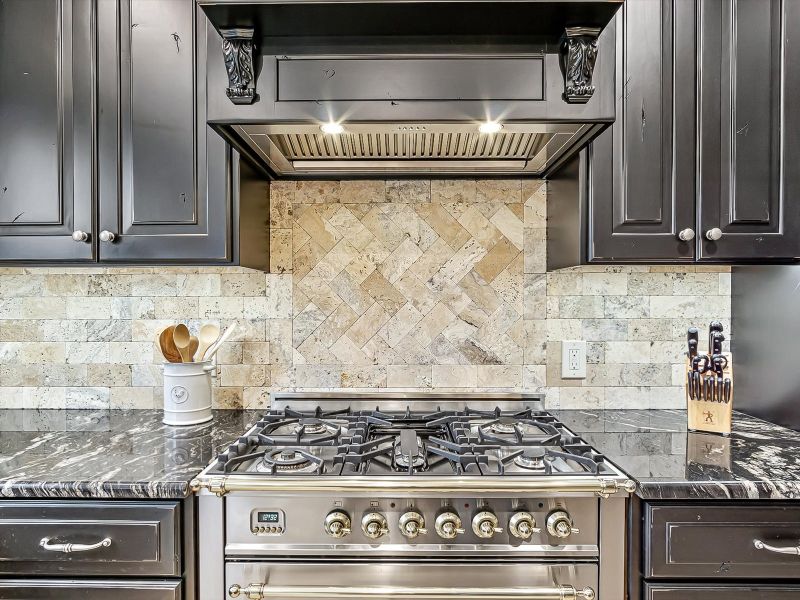
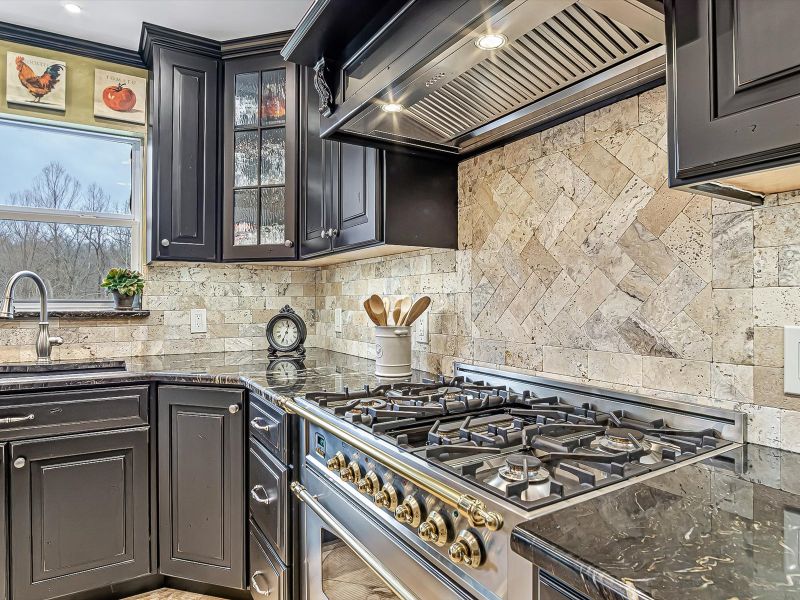
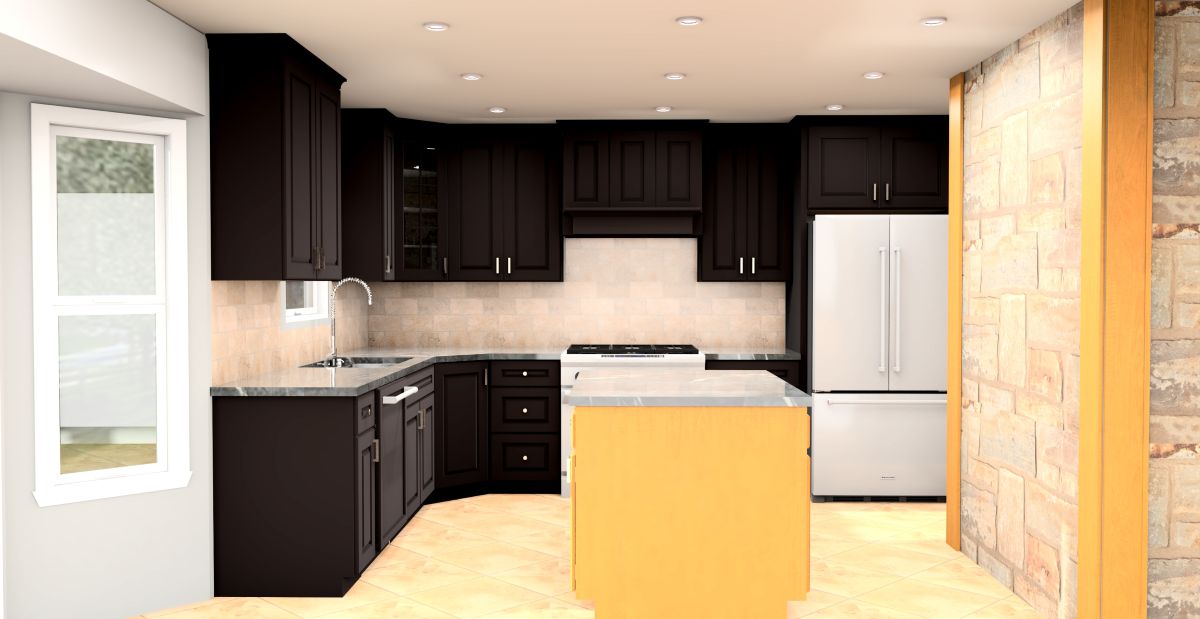
Completed Rustic Kitchen Remodel in Imperial, MO
Ready to Start Your Remodeling Project?
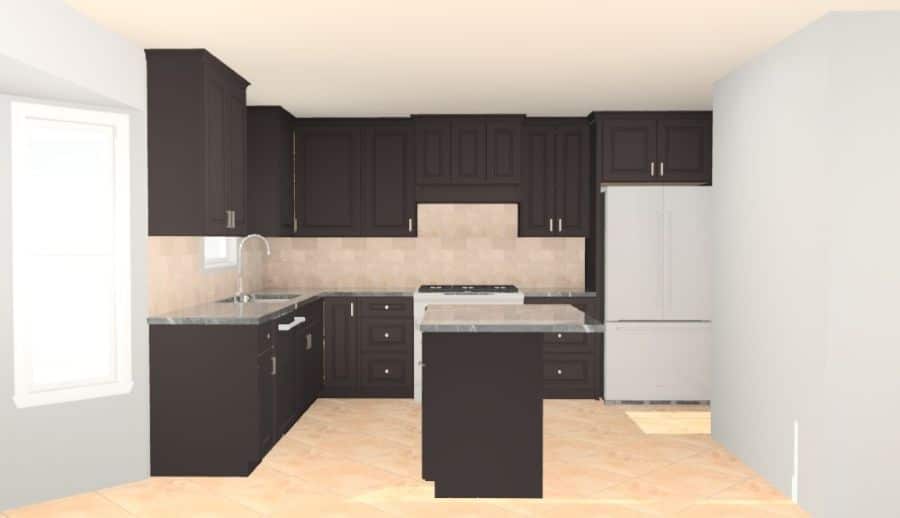
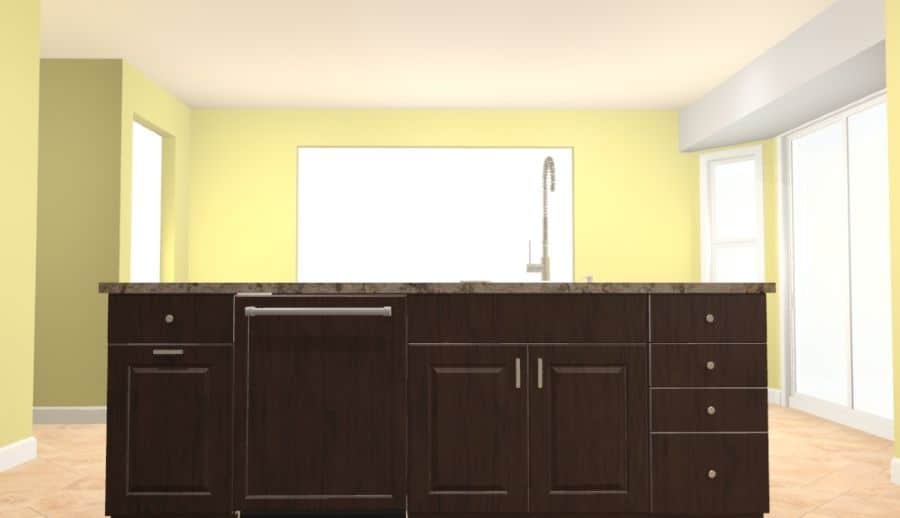
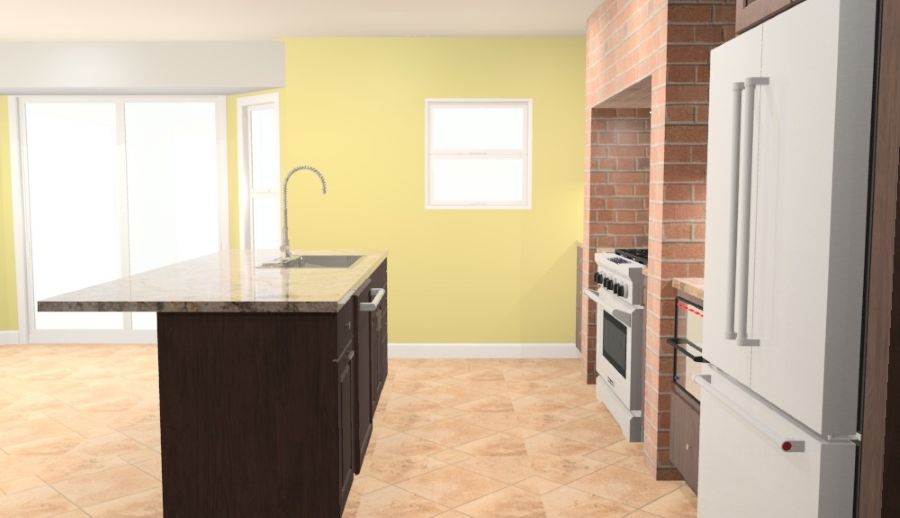
Proposed Rustic Imperial Kitchen Design Ideas
As with all Thompson Price Kitchen and Bathroom remodels, we followed our 4P Remodeling Process 4P Process to transform this kitchen from its outdated state into the envisioned rustic design. The Perfect Plan began with a site visit from the Thompson Price Design Team.
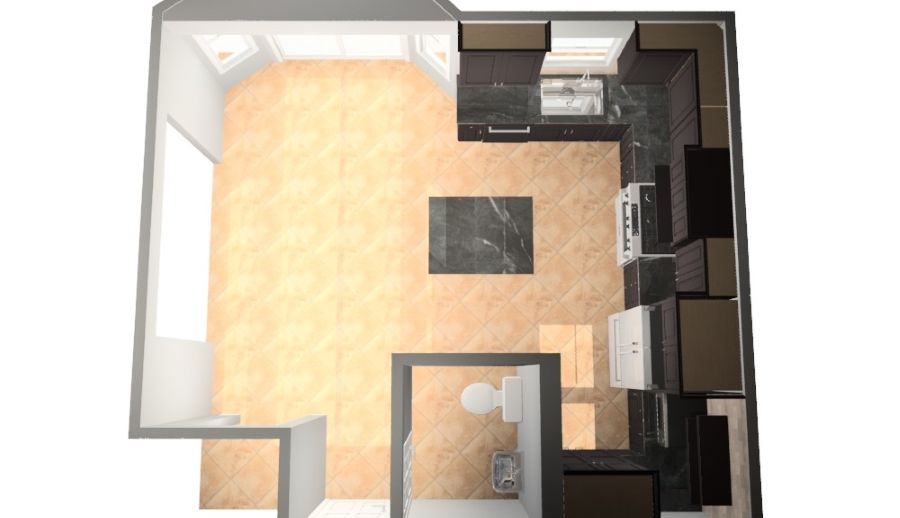
During this stage, we set out to accomplish several important goals. First, we took precise measurements of the existing space. Additionally, we captured around 100 photos of the kitchen to accurately recreate the space and utilities during the design phase. Typically, our Perfect Plan includes two complete new designs for every kitchen or bathroom remodel, ensuring that the client has options to choose from.
Kitchen Design Plan A
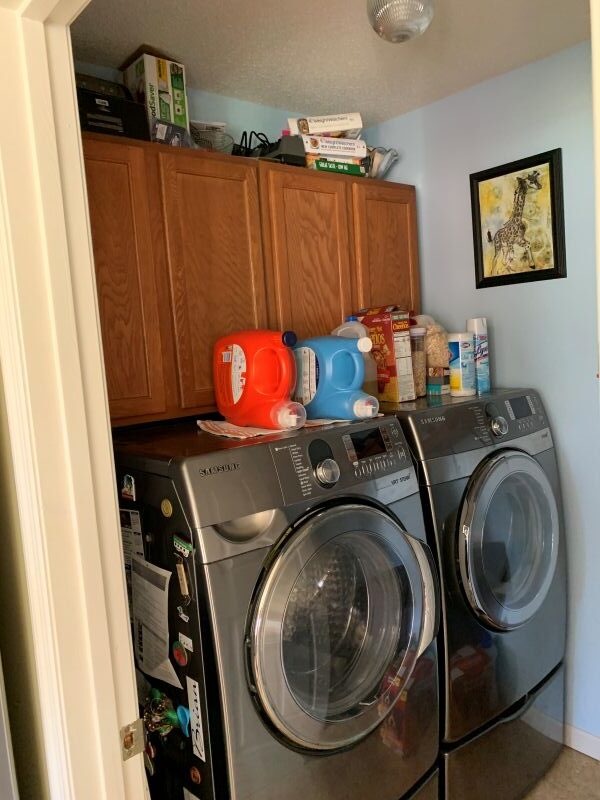
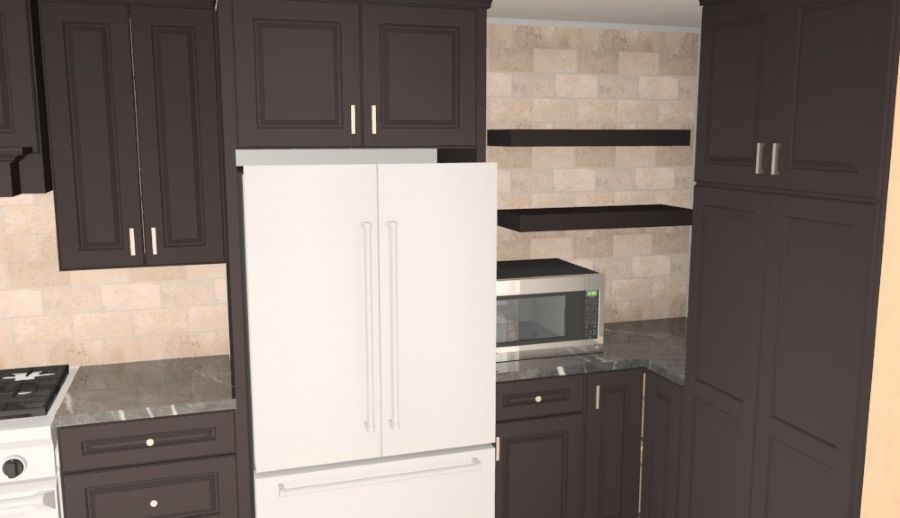
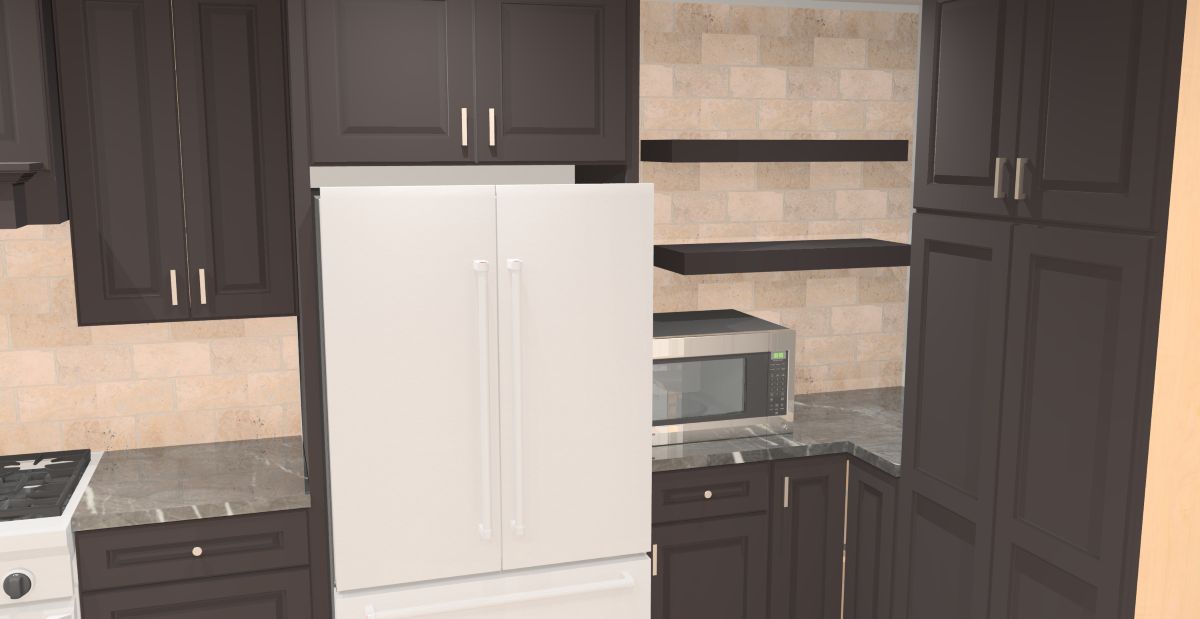
The first design focused on relocating the laundry room to the upstairs bathroom. By moving the laundry, we were able to incorporate that space into the kitchen layout, allowing for the creation of a large pantry with roll-out shelves, a spacious coffee bar and prep area, decorative floating shelves, and space for a countertop microwave.
We maintained the original island orientation to avoid encroaching on the dining area. Furthermore, we designed the island with a custom charging drawer and a trash/recycling cabinet in the cabinetry. To elevate the overall look, we extended all the wall cabinets to the ceiling and finished them with decorative crown molding.
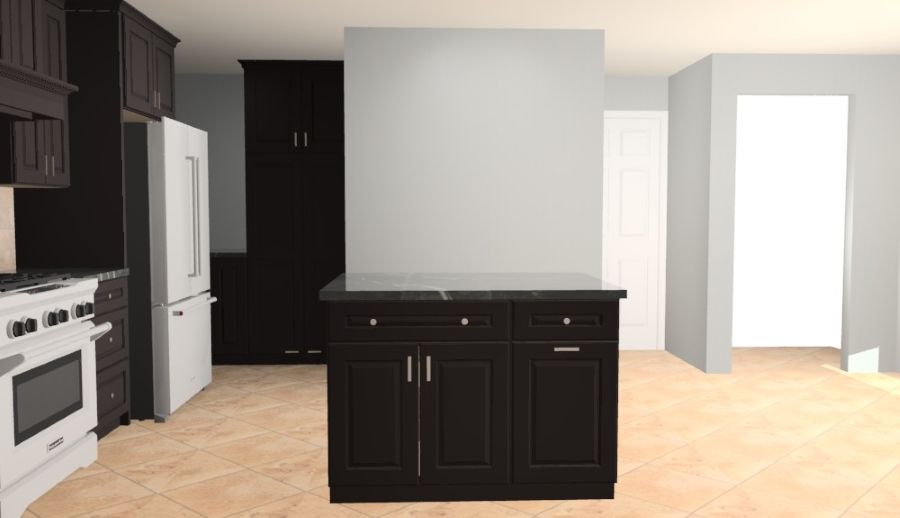
Kitchen Design Plan B
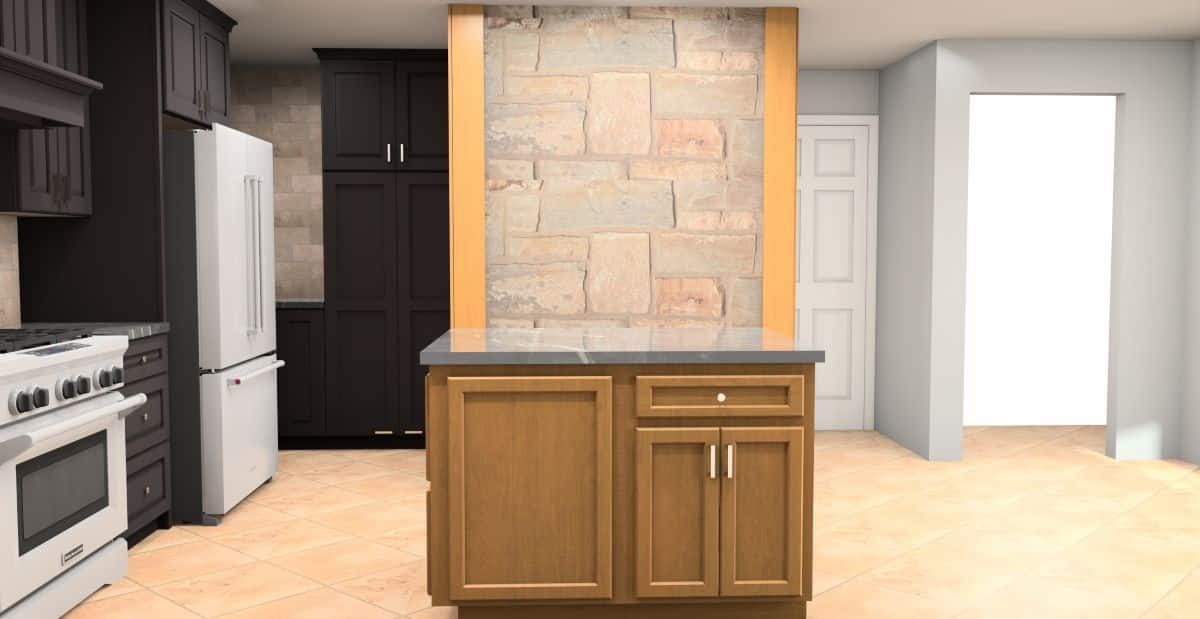
In contrast, Plan B reconfigured the powder room area to create even more space in the kitchen. While this design also removed the laundry area, relocating the powder room allowed us to feature a much larger kitchen island.
This second design made the cooking area the focal point, complete with a custom vent hood framed by stacked stone to add a rustic flair. Since the customer wanted a 36″ custom dual-fuel range, we tailored the design to accommodate this feature.
Kitchen Design Revisions and Product Specifications
Ultimately, the customer selected the first design but requested a few adjustments to the island and pantry areas. We modified the island to include drawer storage on the same side as the range, providing easy access to pots and pans. We also paneled the sides of the island to give it the appearance of a furniture piece. To keep the kitchen countertops clutter-free, we incorporated a charging drawer, allowing the customer’s electronics to remain out of sight while charging. We also made the corner wall cabinet and base cabinet diagonal for single door access. We also specified a mullion door with glass, finished the interior and added lighting inside the corner wall cabinet.
From the outset, we planned to use custom cabinetry for this project. For finishes like rub-through, we first stained the cabinetry, then painted it, and finally hand-sanded the surface to reveal the stain beneath. This process requires a great deal of skill and attention to detail in order to achieve a natural, worn look. No stock cabinet line can replicate the level of customization and craftsmanship that goes into creating this finish.
Imperial, MO Kitchen Remodeling Construction Phase
Once the design, pricing, and scope were finalized, we transitioned into the Perfect Project phase. This phase covers everything from ordering and scheduling to delivering and installing each element of the remodel. The project had a few unique challenges. First, relocating the laundry room to the second level required us to install new electrical and plumbing connections for the washer and dryer. We also needed to vent the dryer, which we accomplished by routing the vent through the attic and over the garage.
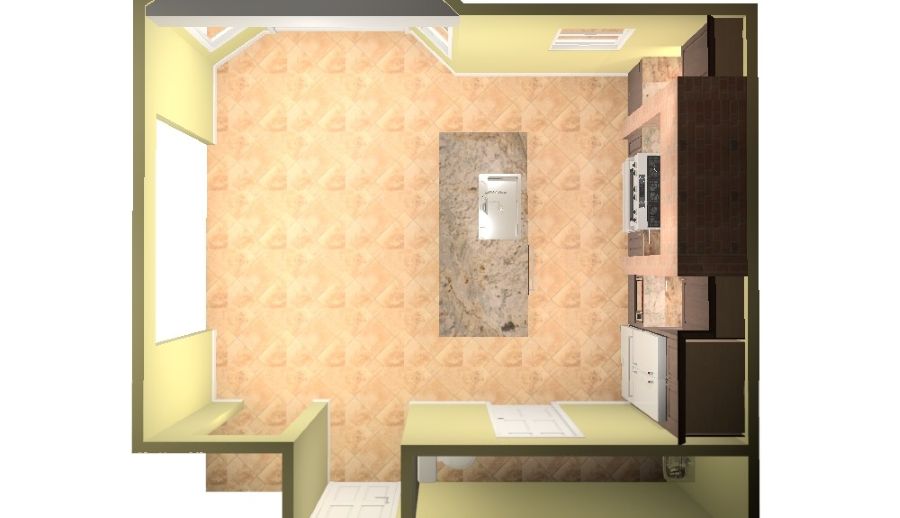
Since the customer wanted to keep the travertine floor, we needed to fill in the flooring where the walls of the old laundry room had been removed. Although the customer had a few spare tiles from the original installation, there weren’t enough to replace entire tiles. To address this, we agreed to fill in the gaps without grout joints, allowing the new tiles to blend seamlessly with the existing floor.
How Long Did This Rustic Imperial Kitchen Remodel Take?
This kitchen remodeling project took a total of 9 weeks, from the first day of demolition to the final cleanup. In the first two weeks, we completed site preparation, demolition, and debris removal. During this time, we also handled rough electrical, plumbing, and mechanical work, which included relocating the laundry room upstairs. After completing these tasks, we conducted rough inspections to ensure everything was up to code.
In the third week, we installed customer-provided travertine tiles to fill in the areas where walls had been removed from the former laundry space. We then hung and taped drywall to prepare the space for the next steps. By the fourth week, we were ready to install the custom kitchen cabinetry. Toward the end of this week, we scheduled the template for the kitchen countertops.
Weeks five and six focused on installing custom wood beams and posts. While we waited for the countertops to be fabricated, we completed various other tasks, including installing the appliances that were ready for placement. The turnaround time for the countertops was two weeks from the template date.
In the seventh week, we installed the new granite countertops. During the eighth week, we installed the tile backsplash, reconnected plumbing fixtures and appliances, and completed electrical work, including under-cabinet and recessed lighting. We also finalized the painting and touch-ups to complete the overall look.
The project wrapped up in the ninth week with a final cleanup and trash removal. We conducted final inspections and a walkthrough with the client to ensure everything looked and functioned as expected. No question – this kitchen remodel in Imperial, MO definitely looks as expected and then some!